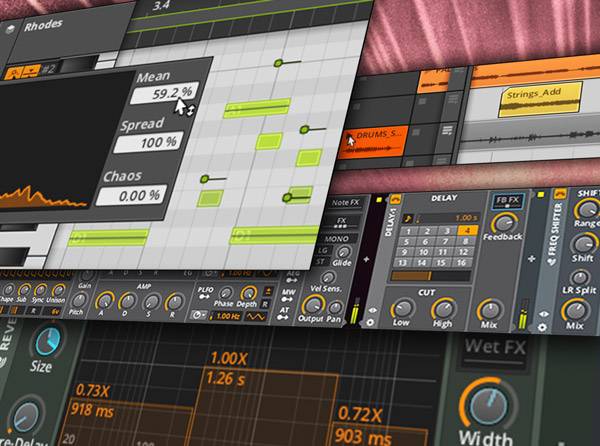
Studio expert Gary Hibner presents detailed video tutorials on Bitwig Studio 4! Whether you need help understanding the many features of this DAW, or just want some tips to improve and speed up your workflow, this course is well worth checking out. After familiarizing himself with the basic layout of the software, Gary begins to explore in detail the impressive set of tools and elements of Bitwig Studio 4, using many illustrative examples so you can hear these ideas in context! These videos are for novice Bitwig users.
Gary welcomes you and gets you started by learning about the Bitwig layout, focusing on the toolbar, viewbar, and header overview so you have a good grasp of the basics before moving on. He then describes the properties of the inspector, which lets you know everything you want about a track or clip, and demonstrates how to save your projects in several different, useful ways. You will then learn about the important editing, looping, zooming, and playback tools and how they work.
Then explore the recording features and learn how to set up inputs, metronome/preroll settings, clip launcher, scenes and more! Then dive into the world of MIDI, where you’ll learn how to set up your MIDI device, record and edit MIDI data, and even create instrument-level multi-instruments and control their various parameters via remote mappings.
Throughout the rest of the course, you will learn about adding effects, using modulation, audio routing/grouping, using takes and compositions, audio stretching/compressing, using automation, exporting your songs, and even how to import Ableton projects directly into Bitwig.
01. The Dashboard 3:40
Gary welcomes you to the video series and starts off by walking you through the Dashboard menu tabs, setting up your Audio Interface, creating your audio inputs, and creating your first project.
02. The Header Overview 5:57
This video walks you through the Header pane and examines the options and actions available. These include how to use the transport functions, pin actions to the header, and how to see the extra options that are available on the expandable buttons.
03. Taking a Look at the Browse Panel 4:13
Gary shows you how to open up the Browse Panel and search for content to add to your tracks. He also explains how the content in the browser is categorized and how you can use the tags to search for specific content.
04. Going Over the Different Views 4:16
In this video, you’ll take a look at the different views available in Bitwig, the two important ones being the Arranger View and the Clip Launcher View. Also learn how the Clip Launcher can be viewed while the Arranger View is visible and how you can choose to show and hide elements in the view, such as the levels. Finally, explore how to view the different editor panels.
05. Going over the Inspector Properties 3:38
When a track or clip is selected, you can view the properties on these selected items. Gary shows you how to view them in the Inspector View and how each one is different when a new item is selected.
06. Saving Projects 3:27
Discover how to save your projects with various methods and the benefits of each. Plus, Gary also shows you how to save a project as a template and recall it when you start a new project.
07. The Tools for Editing, Looping & Copying Clips 4:19
In this video, explore the tools available for editing, copying, and looping clips, such as the knife and selecting tools.
08. Zooming, Looping & Playback 4:56
This video focuses on how you can navigate around Bitwig using the zooming options. Plus, Gary shows how to use the loop bracket to select an area that you want to loop around during playback and the shortcuts that can be used for these functions.
09. Recording Audio 6:41
Discover how to set up your tracks to record audio to them. First, Gary will demonstrate how to set the input correctly for each audio track, how to input monitor and record arm the track, and finally how to set the pre-roll with a metronome and record audio to the track.
10. Using the Clip Launcher 8:09
This video covers how to use the clip launcher and how it differs from the Arranger View. First, Gary shows you how to open a new project and activate its audio engine. Next, he adds clips to the clip launcher slots and shows you how to trigger and stop the playback of these clips.
11. Editing Clips 3:00
Following on from the previous video, you can also edit these clips so that different portions of the clip are played back when triggered. Gary shows you the editing options you have available to when doing so, such as changing the start and end times.
12. How to Use Scenes 6:00
This video expands on the clips and shows you how you can use scenes to arrange your clips and trigger the playback of multiple clips at a time.
13. Recording Your Scenes to the Timeline 3:52
Once you’ve added all the clips and arranged them into their respective scenes, you can then record the sequence of triggered clips to the Arranger Timeline. Gary shows you how to set this up and how to use scenes to trigger different clips during the recording to the Arranger.
14. Setting up Your MIDI Device 5:19
Learn how to set up your external MIDI controller keyboard so that you can input MIDI note data into Bitwig. Gary also demonstrates how you can use your computer keyboard to input MIDI data into Bitwig, a handy option if you don’t want to lug around a MIDI keyboard on the go.
15. Instruments & Devices 6:38
In this video, Gary explains the differences between audio tracks, instrument tracks, and the devices added to these tracks. Plus, he covers how the device signal chain works on a track, showing the routing of the devices added to the device chain.
16. Building up Devices 9:41
This video takes a look at how to build up multi-device instruments in an Instrument Layer and how to use the remote mappings to control parameters on these layered instruments.
17. Going Over the Note Editor Panel 9:29
Discover what’s available in the Note Editor. Learn how to view and edit your MIDI data for a clip and track and how you can do multi track editing in the editor view.
18. What Are Modulators & How to Use Them 8:12
This video takes a look at the modulators and demonstrates how you can assign them to parameters to create some movement via modulation in your songs.
19. Using Note Expression 6:37
Explore what Note Expression is and how you can use it. In this video, Gary demonstrates inputting and editing velocities data and panning data across MIDI notes.
20. Using Note FX 7:31
Learn what Note FX are and how to use them in this video. Use the Arpeggiator Note FX to take MIDI chord note data and manipulate it with a Note FX.
21. Taking a Look at the Mixer 3:40
In this video, Gary gives you a walk around the Mix view. Here, you can see the clip launcher and mixing properties such as level meters, inserts, sends and returns, track fader level, pan, solo, and mute.
22. Adding Effects 8:35
Explore the different ways you can add effects, including inserts and send effects. Gary also shows how to create an FX Layer using a combination of series and parallel effect chains.
23. Audio Routing & Grouping 5:23
In this video, Gary demonstrates the different ways you can group and route audio to tracks. The Audio Receiver effect is one way to route tracks to other tracks, while grouping is a way to combine similar tracks and process them as a single unit.
24. The Audio Editor & Audio Events 4:11
This video covers how to view your audio clips in the Audio Editor and how you can edit these clips into audio events. You can even rearrange your audio part by cutting, copying, and pasting audio events around in the audio editor.
25. Layered Audio Event Editing 5:32
This video goes further into audio editing and explains the layered audio event editing. This option allows you to see multiple tracks at a time, allowing for editing and copying across audio events from one track to the next. Gary also shows how you can process some of your audio events – for example, reversing them, scaling them, and even pitch shifting them.
26. Extra Audio Event Editing Options 4:14
This video explores the extra editing layer options you have in the audio editor. For example, you’ll explore the Pitch, Pan and Gain editing views and learn how you can manipulate your audio events with these lanes.
27. Takes & Comping in the Arrangement View 4:02
This video shows you how you can record to multiple takes on a track and then build up a composite part from all the takes. This is all done in the Arrangement View.
28. Takes & Comping in the Clip Launcher View 4:05
This video takes what you learned with takes and comping in the Arrangement View and shows how you can accomplish similar tasks in the Clip Launcher View.
29. How to Stretch Audio 10:36
Discover how to take advantage of Bitwig’s time-stretching capabilities to either stretch out or compress audio parts. Gary shows you how to add stretch markers and how you can edit and manipulate these to change the timing of your audio. You’l also learn the different stretch modes and how they manipulate the audio.
30. Understanding the Modulation System 5:42
In this video, explore how modulation works within Bitwig and how you can map the three modulators to multiple parameters within your device chain to create a complex, modulated instrument.
31. Using Automation in the Clip Launcher 5:59
This video takes a look at how to use automation on your clips in the Clip Launcher. Gary explains how to select parameters to automate and then how to use the editing tools to write in automation. He also shows you how you can record automation onto a clip.
32. Using Automation in the Arranger View 5:16
In this video, learn how creating and editing automation differs in the Arranger View from the Clip Launcher View. Gary demonstrates how you can move clips across from the Clip Launcher to the Arranger View and how they retain the automation. Also, he shows you the difference between clip and track automation.
33. Importing Ableton Projects 5:44
Bitwig has the capability to open up an Ableton project, which is a great tool if you’re moving across from Ableton to Bitwig. Gary shows how to import your Ableton project and what exactly is transferred from the import process.
34. Exporting Out Your Song 4:47
Gary sums up the course by demonstrating how to export out your song. Learn the different options you have, including how to export specific tracks, the master output, a specific time range, in various formats, and more.
Sample files : none
Video format : MP4
Video : AVC, 1920×1080, 16:9, 30.000 fps, 277 Kbps
Audio : AAC, 44.1 KHz, 128 Kbps, 2 channels
ID : 1
Format : AVC
Format/Info : Advanced Video Codec
Format profile : [email protected]
Format settings, CABAC : Yes
Format settings, ReFrames : 4 frames
Codec ID : avc1
Codec ID/Info : Advanced Video Coding
Duration : 6mn 37s
Bit rate : 277 Kbps
Width : 1 920 pixels
Height : 1 080 pixels
Display aspect ratio : 16:9
Frame rate mode : Constant
Frame rate : 30.000 fps
Color space : YUV
Chroma subsampling : 4:2:0
Bit depth : 8 bits
Scan type : Progressive
Bits/(Pixel*Frame) : 0.004
Stream size : 13.1 MiB (68%)
Writing library : x264 core 155 r2901 7d0ff22
Encoding settings : cabac=1 / ref=3 / deblock=1:0:0 / analyse=0x3:0x113 / me=hex / subme=7 / psy=1 / psy_rd=1.00:0.00 / mixed_ref=1 / me_range=16 / chroma_me=1 / trellis=1 / 8x8dct=1 / cqm=0 / deadzone=21,11 / fast_pskip=1 / chroma_qp_offset=-2 / threads=24 / lookahead_threads=4 / sliced_threads=0 / nr=0 / decimate= 1 / interlaced=0 / bluray_compat=0 / constrained_intra=0 / bframes=3 / b_pyramid=2 / b_adapt=1 / b_bias=0 / direct=1 / weightb=1 / open_gop=0 / weightp=2 / keyint=250 / keyint_min=25 / scenecut=40 / intra_refresh=0 / rc_lookahead=40 / rc=crf / mbtree=1 / crf=25.0 / qcomp=0.60 / qpmin=0 / qpmax=69 / qpstep=4 / ip_ratio=1.40 / aq= 1:1.00
Language : English
Audio #2
ID : 2
Format : AAC
Format/Info : Advanced Audio Codec
Format profile : LC
Codec ID : 40
Duration : 6mn 37s
Bit rate mode : Variable
Bit rate : 112 Kbps
Maximum bit rate : 128 Kbps
Channel(s) : 2 channels
Channel positions : Front: LR
Sampling rate : 44.1 KHz
Compression mode : Lossy
Delay relative to video : -1s 24ms
Stream size : 5.31 MiB (28%)
Language : English


